
We’ve written many times about how important it is to secure your apps and APIs in today’s climate of ransomware and bot‑driven attacks. Along with mechanisms like web application firewall (WAF), authenticating user identities and enforcing authorization controls are important ways to protect your business applications.
The most direct way to implement authentication and authorization is in the applications themselves. While this can work when your user base is small and your app doesn’t require frequent updates, it quickly becomes untenable at scale. For one thing, when your users have to remember a different account name and password for each of many apps, they’re often greeted with frustrating “incorrect username or password” messages when trying to log in, leading them to resort to insecure solutions like easily guessed “abc123” passwords. And we’ve all seen monitors adorned with a halo of Post‑it® notes bearing password reminders!
Single sign‑on (SSO) technologies can partially address these problems by eliminating all those separate usernames and passwords in favor of one set of credentials. Users sign in just once with an Identity Provider (IdP) to get access to many apps. But developers still must include code in their apps to interface with the SSO system, which can be very challenging, especially as applications grow in complexity.
As organizations scale and need to meet the requirements of a surging user base, it becomes critical to offload requirements that aren’t specific to an app’s functionality – such as authentication and authorization – from the application layer. An ideal location for centralized authentication and authorization in Kubernetes is at the Ingress controller, which can scrutinize all traffic entering the cluster and route it to the appropriate services. This frees developers from the burden of building, maintaining, and replicating authentication logic and they can easily leverage SSO technologies at the ingress layer using the native Kubernetes API.
In this blog, we show how to implement a full‑fledged SSO solution with the NGINX Plus-based NGINX Ingress Controller operating as the relaying party, supporting the OIDC Authorization Code Flow with Okta as the preconfigured identity provider (IdP).
Note: This feature is not available with the NGINX Open Source‑based NGINX Ingress Controller.
Prerequisites
This blog assumes you have experience operating in Kubernetes environments. In addition, you need the following:
- A Kubernetes environment – NGINX Ingress Controller is supported on vanilla Kubernetes as well as numerous Kubernetes platforms including Amazon Elastic Kubernetes (EKS), bare metal, Google Kubernetes Engine (GKE), Microsoft Azure Kubernetes Service (AKS), Rancher Kubernetes Engine, and Red Hat OpenShift.
- NGINX Plus-based NGINX Ingress Controller – You must have a valid license for the NGINX Plus-based version of NGINX Ingress Controller. You can get started with a license today by requesting a free 30-day trial. For additional information, see our documentation.
- An Okta developer account – To configure Okta as your IdP, start by signing up for a developer account. As an alternative, download the Okta Command Line Interface (CLI) and run the
oktaregistercommand to sign up for a new account. At the time of writing, the Okta CLI is in beta and not recommended for production use.
Preconfiguring the IdP
Cloud services must know where to retrieve and verify user identities, which is where an IdP becomes necessary. An IdP manages and stores digital identities securely and ensures attackers cannot steal identities to impersonate users.
In this section we use the Okta CLI to preconfigure Okta as the IdP, creating what Okta calls an app integration.
- Run the
oktalogincommand to authenticate the Okta CLI with your Okta Developer Account. Enter your Okta domain and API token at the prompts.
$ okta login Okta Org URL: https://your-okta-domain
Okta API token: your-api-token- Create the app integration:
$ okta apps create --app-name=mywebapp --redirect-uri=http[s]://ingress-controller-hostname/_codexch- where
--app-namedefines the application name (here, mywebapp)--redirect-uridefines the URI to which sign‑ins are redirected (here, ingress-controller-hostname/_codexch)
- Specify the application type in response to the prompts, first with 1 (representing a web application) and then 5 (representing a framework other than the listed ones).
Type of Application
(The Okta CLI only supports a subset of application types and properties):
> 1: Web
> 2: Single Page App
> 3: Native App (mobile)
> 4: Service (Machine-to-Machine)
Enter your choice [Web]: 1
Type of Application
> 1: Okta Spring Boot Starter
> 2: Spring Boot
> 3: JHipster
> 4: Quarkus
> 5: Other
Enter your choice [Other]: 5
Configuring a new OIDC Application, almost done:
Created OIDC application, client-id: 0oa1mi...OrfQAg5d7
Configuring the NGINX Ingress Controller
Configure the NGINX Plus-based version of NGINX Ingress Controller as the relaying party that authenticates users.
Defining a Client Credential Secret
For security reasons, hardcoding the client secret in the OIDC Policy Object is not supported. Instead, we create a Kubernetes Secret with data containing the base64‑encoded value of the client secret.
apiVersion: v1
kind: Secret
metadata:
  name: oidc-secret
type: nginx.org/oidc
data:
  client-secret: base64-encoded-value-of-client-secret
Then apply the YAML file containing the Secret (here, client-secret.yaml):
$ kubectl apply –f client-secret.yamlGetting the Auth Endpoints
Use the OAuth 2.0 and OpenID Connect API to get information about the endpoints that Okta exposes on its authorization servers.
Run the following command on your local machine to output information about your Okta endpoints. Note the values of authorization_endpoint, token_endpoint, and jwks_uri as shown in the sample output. You use them in the next section.
$ curl -i https://your-okta-domain/.well-known/openid-configuration
{
    "authorization_endpoint": "https://your-okta-domain/oauth2/v1/authorize",
    ...
    "jwks_uri": "https://your-okta-domain/oauth2/v1/keys",
    ...
    "token_endpoint": "https://your-okta-domain/oauth2/v1/token",
 ...
 }
Defining the NGINX Ingress OIDC Policy
Support for OIDC‑based authentication was added in NGINX Ingress Controller 1.10.0. For details, read Easy and Robust Single Sign‑On with OpenID Connect and NGINX Ingress Controller on our blog.
The NGINX Ingress Controller implementation of OIDC authentication uses a Policy object, a Kubernetes custom resource which defines an OIDC policy in NGINX Ingress Controller.
- Insert the information obtained in the previous section in the
authEndpoint,tokenEndpoint, andjwksURIfields of thePolicyobject.
apiVersion: k8s.nginx.org/v1
kind: Policy
metadata:
  name: oidc-policy
spec:
  oidc:
    clientID: client-id
    clientSecret: oidc-secret
    authEndpoint: https://your-okta-domain/oauth2/v1/authorize
    tokenEndpoint: https://your-okta-domain/oauth2/v1/token
jwksURI: https://your-okta-domain/oauth2/v1/keys- Apply the policy (here defined in oidc.yaml):
$ kubectl apply -f oidc.yaml- (Optional) Check the validity of the policy:
$ kubectl get policy

NAME          STATE   AGE
oidc-policy   Valid   2m
Defining the VirtualServer Object
VirtualServer and VirtualServerRoute are NGINX Ingress resources that provision the rules for routing incoming traffic to the backend applications in the Kubernetes cluster. For an OIDC policy to take effect, it must be referenced in a VirtualServer or VirtualServerRoute resource.
- Reference an OIDC policy under the / path prefix so that users who request paths that match the prefix are authenticated before the request is proxied to the
app-server-payloadService.
apiVersion: k8s.nginx.org/v1
kind: VirtualServer
metadata:
  name: app-ingress
spec:
  host: unit-demo.linkpc.net
  upstreams:
  - name: app-server-payload
    service: app-server-svc
    port: 80
  routes:
  - path: /
    policies:
    - name: oidc-policy
    action:
      proxy:
upstream: app-server-payload- Apply the VirtualServer resource (here defined in app-virtual-server.yaml):
$ kubectl apply -f app-virtual-server.yaml- (Optional.) Verify the validity of the resource:
$ kubectl get vs

NAME          STATE   HOST                   IP    PORTS   AGE
app-ingress   Valid   unit-demo.linkpc.net                 2m
Testing the Environment
To test that the OIDC Okta integration is working correctly, enter the hostname of the NGINX Ingress Controller in the address bar of your browser. You are redirected to the Okta login portal, where you can enter the credentials for your Okta developer account to gain access to the backend application.
Once successfully authenticated you gain access to the app-server-payload upstream service.
Adding Users to the Application
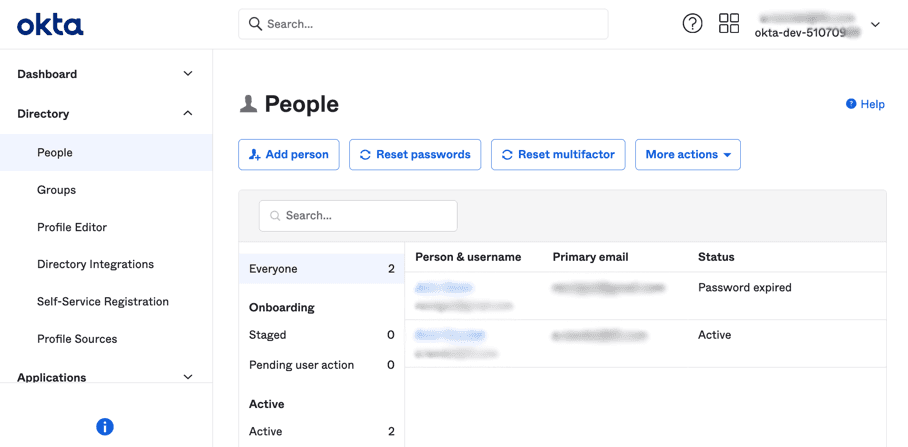
In most cases, multiple users in your organization need to access your apps. Add each user on the People page under the Directory category in the Okta Admin console.
Creating SSO Integrations for Multiple Apps
We’ve offloaded the authentication process from one application by configuring SSO with Okta as the IdP and NGINX Ingress Controller as the relaying party. In practice, you probably want to enable users to access many applications using a single set of credentials. You might also want the flexibility to vary which applications a user can access. You can do this by repeating the instructions in the sections above:
- Preconfiguring the IdP to integrate other applications with Okta
- Defining the NGINX Ingress OIDC Policy to define other OIDC policies
- Defining the VirtualServer Object to reference additional policies
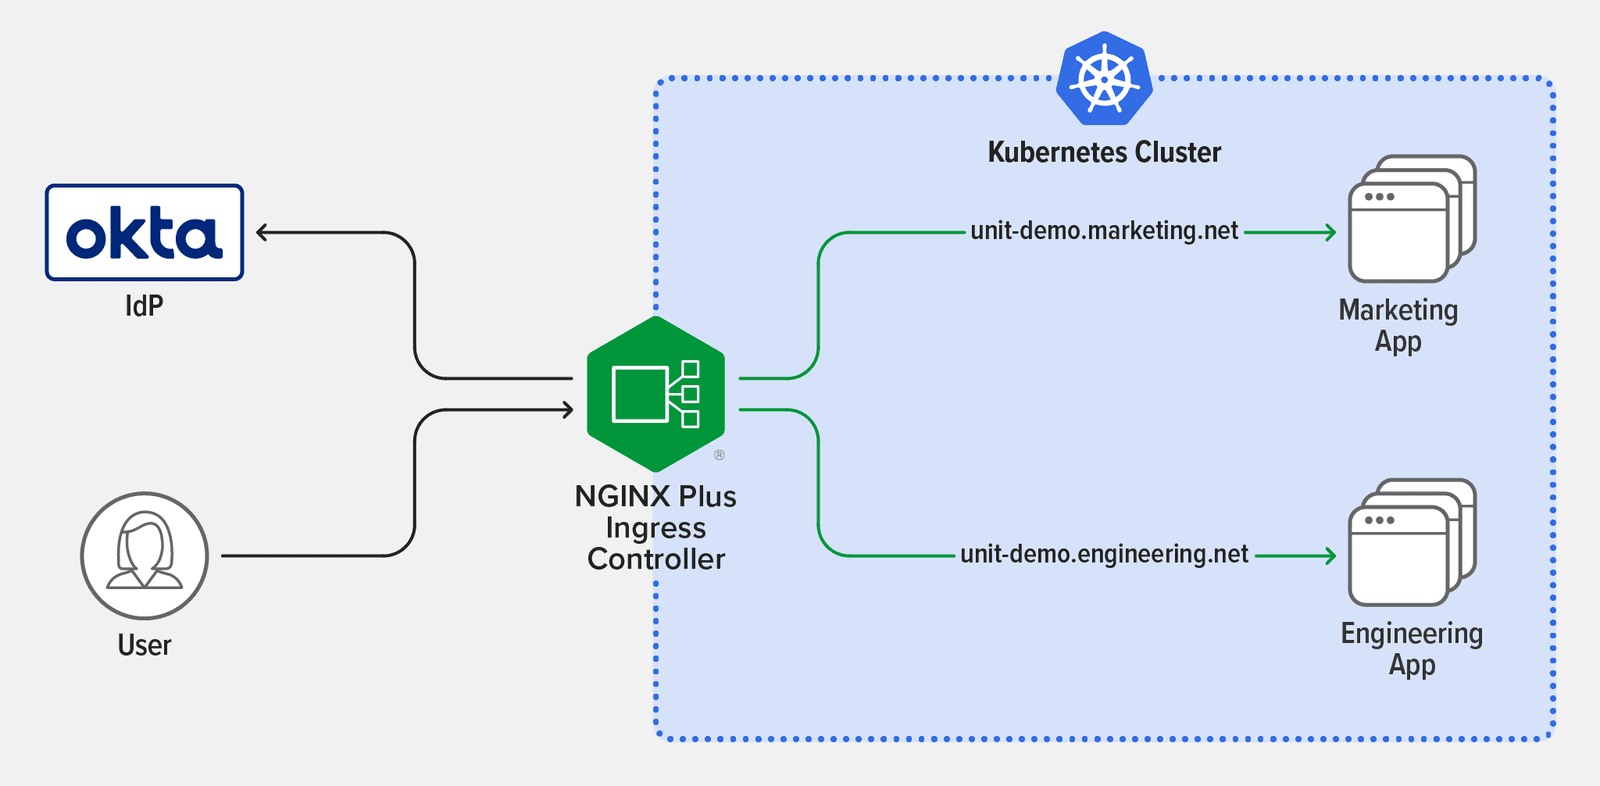
In the example depicted in the following diagram, there are two subdomains, unit-demo.marketing.net and unit-demo.engineering.net, that resolve to the external IP address of NGINX Ingress Controller. NGINX Ingress Controller routes requests to either the Marketing app or the Engineering app based on the subdomain. To grant access to a user, on the Assignments tab of the Okta GUI you associate the user with each appropriate application. Okta then grants the authenticated user a short‑lived session cookie for access to those applications.
Conclusion
By implementing OIDC‑based SSO in Kubernetes using NGINX Ingress Controller as the relaying party and Okta as the IdP, you offload authentication and authorization from your developers, freeing them to focus on optimizing the business logic in their apps. To get started with the NGINX Plus-based NGINX Ingress Controller, request a free 30-day trial today or contact us to discuss your use cases.
About the Author

Related Blog Posts

Automating Certificate Management in a Kubernetes Environment
Simplify cert management by providing unique, automatically renewed and updated certificates to your endpoints.

Secure Your API Gateway with NGINX App Protect WAF
As monoliths move to microservices, applications are developed faster than ever. Speed is necessary to stay competitive and APIs sit at the front of these rapid modernization efforts. But the popularity of APIs for application modernization has significant implications for app security.
How Do I Choose? API Gateway vs. Ingress Controller vs. Service Mesh
When you need an API gateway in Kubernetes, how do you choose among API gateway vs. Ingress controller vs. service mesh? We guide you through the decision, with sample scenarios for north-south and east-west API traffic, plus use cases where an API gateway is the right tool.
Deploying NGINX as an API Gateway, Part 2: Protecting Backend Services
In the second post in our API gateway series, Liam shows you how to batten down the hatches on your API services. You can use rate limiting, access restrictions, request size limits, and request body validation to frustrate illegitimate or overly burdensome requests.
New Joomla Exploit CVE-2015-8562
Read about the new zero day exploit in Joomla and see the NGINX configuration for how to apply a fix in NGINX or NGINX Plus.
Why Do I See “Welcome to nginx!” on My Favorite Website?
The ‘Welcome to NGINX!’ page is presented when NGINX web server software is installed on a computer but has not finished configuring